Understanding Your Philips Sonicare Toothbrush
Getting to Know the Philips Sonicare Series
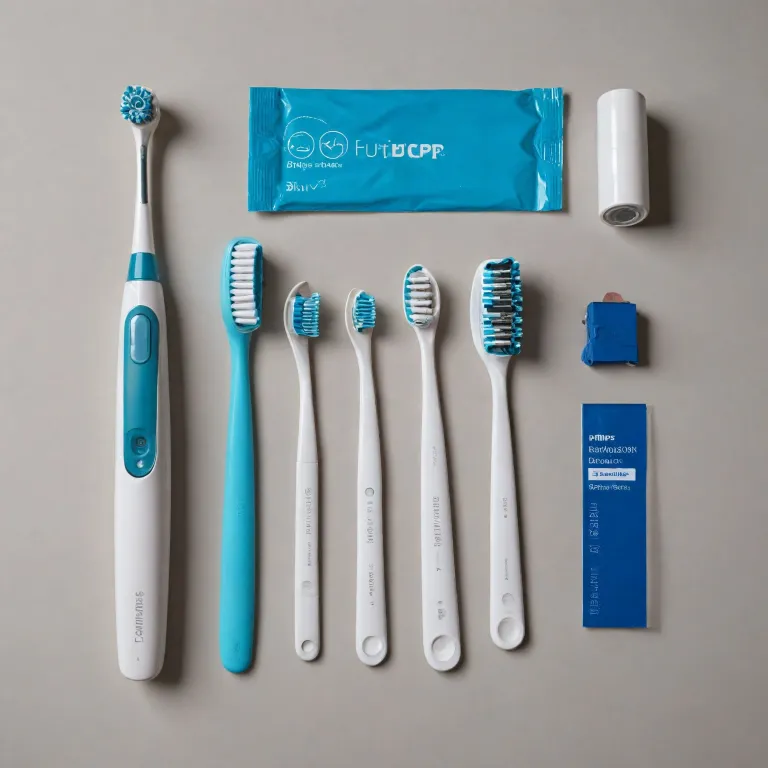
The Philips Sonicare series has become a household name in the realm of electric toothbrushes. Known for their effectiveness, these toothbrushes offer users an efficient oral hygiene solution thanks to their advanced sonic technology. Philips Sonicare toothbrushes are engineered to optimize cleaning with over 31,000 brush movements per minute, which ensures a comprehensive removal of plaque and debris from the teeth and gums.Dissecting the Sonicare's Internal Features
Understanding the inner workings of your Sonicare toothbrush can be beneficial when it comes time for battery replacement or general maintenance. Key components include the motor, the toothbrush battery pack, the electronic circuit board (PCB), and connectors, all housed within the handle. The product features a rubber seal to protect the internal elements from moisture, prolonging the lifespan of the brush. This seal is crucial as it prevents any damage due to water ingress. The brush heads, especially when properly maintained, allow for a personalized brushing experience by offering different types of filament stiffness and shapes aimed at specific dental needs. The lithium ion battery, housed within the handle, provides adequate power for the toothbrush and contributes to its overall longevity.Spotting Battery Replacement Needs
One of the prominent signs that your Sonicare toothbrush's battery might need replacing is a noticeable decline in performance or frequency of needing to charge the device. If you observe a drop in cleaning efficiency, it could be indicative of a declining battery. For more insights on battery questions and Sonicare product support, this helpful guide on troubleshooting issues could provide some beneficial information.Why Proper Maintenance Matters
Besides being well-versed with your Sonicare toothbrush's architecture, adopting regular maintenance can significantly extend its lifespan. Ensuring the rubber seal remains intact, periodically replacing the brush head, and keeping the handle clean are some of the ways users can ensure their toothbrush remains in optimum working condition over the years.Signs Your Toothbrush Battery Needs Replacement
Identifying Battery Issues in Your Sonicare Toothbrush
Understanding when your Philips Sonicare toothbrush's battery needs attention is crucial to maintaining its optimal performance. Various signs can indicate that your toothbrush may need a battery replacement, ensuring you continue to enjoy its benefits without interruption.
Common Indicators of a Depleted Battery
- Shortened Battery Life: Your Sonicare toothbrush may not hold a charge as long as it used to, requiring frequent recharging sessions.
- Inconsistent Power: If the brush starts and stops during usage or shows a noticeable decrease in brushing power, it's a strong indication of battery issues.
- Charging Difficulties: A toothbrush that struggles to charge consistently or doesn't charge at all may have a battery in need of replacement.
- Unresponsive or Flickering Lights: The charge indicator lights could behave erratically, either not lighting up appropriately or flickering.
In addressing these signs, it's beneficial to be familiar with the inner workings of your electric toothbrush. The battery, often a lithium-ion pack, is housed within the handle's sealed section, designed for longevity but not immune to degradation over time.
For a more comprehensive understanding of how to care for your electric toothbrush battery to maximize its lifespan, you might find this resource on electric toothbrush battery care insightful.
Recognizing these warning signs early can provide the opportunity to plan for necessary procedures such as battery replacement, ensuring your Sonicare series electric toothbrush remains a reliable part of your oral hygiene routine.
Tools and Materials Needed for Battery Replacement
Essential Tools and Materials for Battery Replacement
Taking on the task of replacing the battery in your Philips Sonicare toothbrush can seem daunting, especially without the right support and materials. However, with some preparation and a bit of patience, this project can be made much simpler. Here’s a brief guide to help you gather everything you need before starting the procedure.- Screwdriver: Depending on your model and series of the Sonicare toothbrush, you might need a small Phillips or flathead screwdriver to remove the exterior screws.
- Soldering Iron: A critical tool for this process, the soldering iron will help you remove and replace solder from the battery terminals on the printed circuit board (PCB). Ensure it’s in good condition to effectively manage the tightly packed components.
- Desoldering Tool: Whether it’s a solder wick or a desoldering pump, a desoldering tool helps to cleanly remove solder when extracting the old battery. This will prevent damage to the connections on the PCB.
- Replacement Battery Pack: Identifying the correct battery replacement compatible with your Philips Sonicare is essential. Look for a lithium-ion battery, appropriately sized to fit within your model’s handle.
- Plastic Pry Tool: Use this to carefully pry open the toothbrush without causing damage to the casing. A plastic tool is recommended over metal to avoid scratching or breaking the rubber seal.
- Protective Gear: It's advisable to wear safety goggles and gloves to protect yourself from any solid material and liquid battery leakage that might occur during the replacement.
- Small Bowl or Container: To keep all removed screws, components, and other small parts organized and prevent losing them during your work.
Step-by-Step Guide to Replacing the Battery
Getting Started with Battery Replacement
To successfully replace the battery in your Philips Sonicare toothbrush, attention to detail and patience are key. Here’s a guide detailing each step thoroughly, ensuring your sonicare series toothbrush continues to perform optimally.
Preparation and Disassembly
Start by ensuring the electric toothbrush is unplugged and turned off. A clear workspace is essential. Using a small flat tool, carefully pry open the base of the toothbrush handle where the rubber seal typically sits. Be patient with this step, as you aim to avoid damaging the rubber seal or the inner workings.
Accessing the Battery
With the handle open, locate the battery assembly. This includes the lithium-ion battery pack, which is directly connected to the device’s printed circuit board (PCB). Gently remove any clips or fasteners holding the assembly in place. If your model is from the older sonicare series, this may involve slightly different steps; consult the product manual if necessary.
Soldering Tips
Soldering skills are important here. If comfortable, you can proceed with desoldering the old battery connections. A soldering iron will remove the solder securing the battery terminals to the PCB. Gently heat the positive and negative terminals, taking care not to damage the board itself.
Inserting the New Battery
Once the old battery is detached, position the new sonicare replacement battery in place of the old ones. Secure with fresh solder, making sure new connections are stable for optimum power support. Pay attention to the polarity; improperly placed, your electric toothbrush won't function.
Reassembly for Continued Use
Carefully reseal the toothbrush handle with the rubber seal. Ensuring a proper seal is crucial to maintaining the water-resistant quality. After the reassembly, test the sonicare toothbrush to confirm that it powers up with the fresh battery. Your device should be ready for another cycle of use, offering the kind of oral care you expect from a Philips product.
Though this process may seem daunting, following the above step-by-step guide provides a straightforward method for battery replacement, extending the life of your electric toothbrush.
Safety Tips and Precautions
Ensuring Safety First During Battery Replacement
When undertaking the task of replacing your Philips Sonicare toothbrush battery, a strong emphasis on safety is paramount. Engaging in this process requires both precautionary measures and careful handling of specific tools. To achieve a successful battery replacement without compromising safety, consider the following guidance:- Power Off and Disconnect: Always start by switching off the toothbrush and ensuring it is not connected to any power source. This minimizes the risk of electric shock or short-circuiting during battery removal.
- Work in a Safe Environment: Choose a well-lit and dry workspace for your project. A stable, flat surface helps in managing the small components like the positive and negative connectors on the battery pack.
- Use the Correct Tools: Ensure you have the right tools mentioned in the guide, such as a soldering iron, to properly remove solder and handle the inner workings of your toothbrush without damaging it.
- Handle the Soldering Iron Carefully: When using a soldering iron, be cautious of its heat. It is essential to support the brush handle steadily and only touch the points required to remove the battery connections.
- Watch for Damaging Components: If your toothbrush model includes a rubber seal, be cautious not to tear it. Maintaining the seal is crucial for the waterproof abilities of the product.
- Mind the New Battery: Handle the new lithium-ion battery carefully during installation. Avoid applying excessive pressure which could damage the battery or the internal PCB (Printed Circuit Board).
- Testing Post-Replacement: After the new battery is securely installed, ensure everything is sealed back properly. Test the device functions prior to using it to guarantee that the replacement was successful.
- Dispose of Old Batteries Responsibly: Always dispose of the nickel-metal hydride or lithium-ion batteries properly in designated recycling facilities to prevent environmental harm.
Maintaining Your Toothbrush for Longevity
Preserve the Inner Workings for Extended Use
To ensure that your Philips Sonicare, or any other electric toothbrush, performs to its best and sustains its longevity, regular maintenance post-battery replacement is crucial. Here are some practical tips to not only maintain but also enhance the lifespan of your toothbrush.- Regular Cleaning and Inspection: Ensure to clean the toothbrush handle, focusing on areas around the rubber seal, where residue tends to accumulate. Periodically inspect the brush heads to confirm they are functioning properly.
- Proper Charging Cycles: For lithium-ion batteries, it's vital to follow proper charging procedures to extend battery life. Avoid overcharging and only place the toothbrush on the charger when the battery is low.
- Safe Storage: Keep your toothbrush in a dry area. Moisture can damage the electric components, such as the PCB (Printed Circuit Board) and the soldered connections.
- Mindful Handling: Handle the toothbrush with care. This helps prevent any unwanted damage, especially to the sensitive soldering points inside the handle. Soldering issues can lead to connectivity problems or battery failure.
- Replacement Brush Heads: Use genuine Philips or sonicare replacements to ensure compatibility and optimal performance. Regularly replacing the brush heads when they show wear will maintain the effectiveness of your toothbrush.