Understanding Your Oral-B Toothbrush Model
Recognizing Your Oral-B Electric Toothbrush
Before embarking on the task of replacing the battery in your Oral-B toothbrush, it’s crucial to familiarize yourself with the specific model you own. Understanding the intricacies of your electric toothbrush, whether it's a Braun Oral model or another from the top oral brands, can significantly ease the battery replacement process. The model will dictate not only the type of battery your device uses but also the right tools and steps needed for replacement.
Oral-B, one of the well-regarded leaders in oral care, offers a variety of sophisticated toothbrushes equipped with smart features. While these electric toothbrushes are designed with longevity in mind, understanding your particular model's capabilities and the necessary components is key.
- Check the Handle: Inspect your toothbrush's handle for a model number or specific identifier. This detail is often located at the base or inside the battery compartment.
- Consult the Box: If you have the original packaging, it can help confirm your toothbrush model. Additionally, most boxes contain essential information on privacy policy and warranty which might be helpful if facing recurring issues.
- Search Online Resources: You can find extensive online resources and posts that can further clarify your toothbrush model characteristics. These can include instructional videos or detailed guides on specific battery types.
Knowing your toothbrush model helps you understand the battery life expectancy and potential replacement needs. If you're uncertain about your model, these steps can point you in the right direction and assist when consulting with customer help centers to ensure proper shipping of replacement parts.
Tools Required for Battery Replacement
Gathering the Right Tools for the Job
Before diving into the process of replacing the battery in your Oral-B toothbrush, it's crucial to have the right tools at your disposal. This will not only make the task easier but also help prevent any damage to the toothbrush handle or other components. Here's a list of tools you'll need:
- Screwdriver Set: A precision screwdriver set is essential, as you'll likely need a small Phillips or flathead screwdriver to open the toothbrush handle.
- Plastic Pry Tool: This tool helps in gently prying open the toothbrush casing without scratching or damaging it.
- Soldering Iron: If your model requires soldering to replace the battery, a soldering iron will be necessary. Ensure you have some basic soldering skills or seek help if needed.
- Replacement Battery: Make sure you have the correct battery model for your Oral-B toothbrush. Check the specifications in the user manual or the manufacturer's website.
- Protective Gear: Safety goggles and gloves can protect you from any accidental mishaps during the process.
Having these tools ready will streamline the battery replacement process and help you avoid common challenges. If you're unsure about any step, consider watching a video tutorial or consulting the manufacturer's privacy policy for guidance on handling the device safely.
Step-by-Step Battery Replacement Guide
Disassembling Your Toothbrush
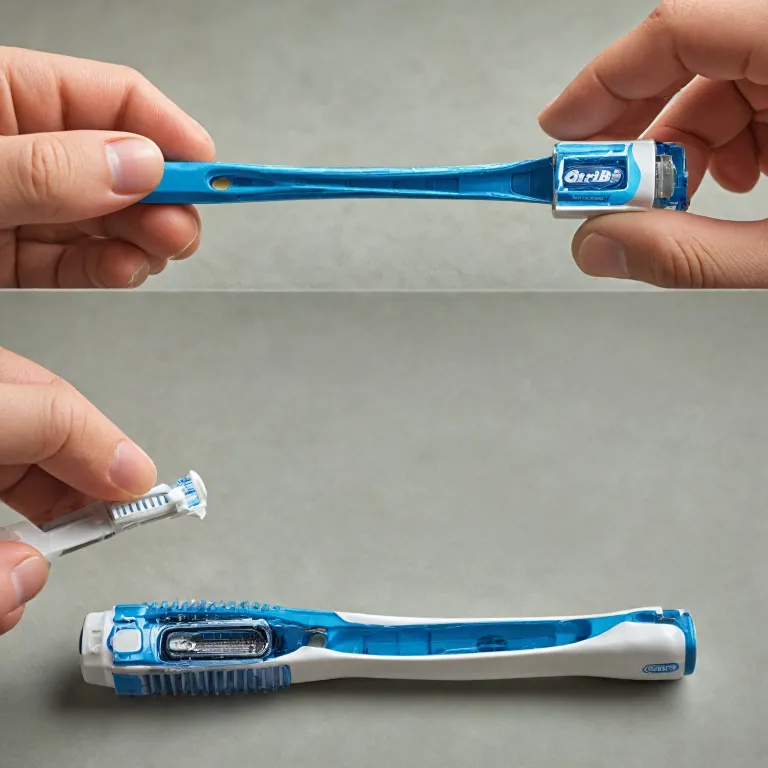
Before starting, ensure you have readied all the tools outlined in the previous section. Begin by removing the brush head. Twist it gently off the handle, revealing the underlying plastic housing. This gives access to the section containing the battery.Accessing the Battery Compartment
With the brush head removed, locate the circular or rectangular panels on the toothbrush body. Use a flat screwdriver or a similar tool to gently pry open these sections; take care not to damage the housing. Within, you'll find the battery securely fastened.Extracting the Old Battery
Carefully lift the battery oral from its compartment. If it's tightly secured, a gentle wiggle can help it come free. Remember to note the orientation of connectors to avoid issues when installing the new battery.Installing the New Battery
Position the new battery into its designated slot. Ensure the polarity is correctly aligned with the connectors for optimal function. Secure it firmly, but avoid applying excessive force which might damage the toothbrush model.Reassembling the Toothbrush
Once the new battery is in place, reattach any internal panels. Snap the brush head back onto the handle securely. Test the electronic components to confirm it's operational. For more detailed steps and visual aids, you might find useful information in related warranty policy insights.Common Challenges and Solutions
Overcoming Common Obstacles in Battery Replacement
Replacing the battery in your Braun Oral-B toothbrush model can sometimes present challenges. Here are some common issues you might encounter and their solutions to ensure a smooth battery replacement process.- Difficulty in Opening the Handle: One of the first hurdles you might face is opening the handle. Your model might be sealed tightly to prevent water ingress. To tackle this, use a flat tool like a spudger or a flathead screwdriver to gently pry the handle open. Be cautious to avoid damaging the brush.
- Locating the Battery: Once you've managed to open the handle, locating the battery might not be straightforward. Check the inner side of the casing, and you should find it near the bottom. In some models, it might be slightly recessed, requiring a careful approach to remove the old battery.
- Handling Fragile Parts: The internal components of your toothbrush, like the circuit board and wiring, are delicate. When removing the old battery and installing the new one, ensure you do not exert too much force, which might damage these parts.
- Compatibility Issues: If after replacing the battery, the electric toothbrush fails to turn on, it might be due to using an incompatible battery. Always ensure that the replacement battery matches the specifications required by your model.
- Reassembling the Toothbrush: Putting the toothbrush back together can be as tricky as opening it. Pay attention to the orientation of the inner components. Reverse the steps you used to open it, making sure everything aligns perfectly before you seal the handle.
Maintaining Your Electric Toothbrush
Ensuring Optimal Performance for Your Electric Toothbrush
To keep your electric toothbrush operating seamlessly, consistent care is essential. Here are some maintenance tips that can help extend the life of your Braun Oral model and ensure efficient cleaning:- Regular Cleaning: After each use, rinse the brush head thoroughly to remove toothpaste and debris. Periodically, clean the handle gently with a damp cloth to prevent build-up that might affect performance.
- Routine Inspection: Regularly check the brush head for signs of wear. Over time, bristles may fray, reducing their effectiveness. Replace your brush head every three months or sooner if necessary.
- Battery Health: To maintain battery efficiency, allow your Oral electric toothbrush to run down completely before recharging. If you find your toothbrush losing charge quickly or not holding power, it might be time to replace the battery, as outlined in our step-by-step guide.
- Safe Storage: Store your toothbrush in an upright position in a well-ventilated area. This prevents moisture accumulation that could lead to mold growth or damage the handle.
When to Consider a New Toothbrush
Signs It's Time for a Fresh Start with Your Toothbrush
When considering the longevity of your Braun Oral electric toothbrush, it's crucial to recognize the signs that indicate it's time to upgrade. After replacing the battery, you may still encounter challenges that suggest your device has seen better days.- Diminished Cleaning Efficiency: Even after replacing the battery of your Oral-B model, if you notice that the toothbrush no longer delivers the same cleaning power, it could be an indication that other components are worn.
- Frequent Technical Issues: If you find yourself constantly troubleshooting issues, like a faulty handle or connectivity struggles with smart toothbrush features, a fresh brush might save you time and energy.
- Outdated Model Features: Oral electric toothbrush technology evolves, with new features designed to enhance your oral hygiene. If your model lacks newer smart capabilities, it might not meet your current needs.
- Privacy and Data Concerns: Modern toothbrush models sometimes offer enhanced privacy policies and data encryption. If these are priorities, it could be a compelling reason to switch to a newer Oral-B unit.
- Physical Wear and Tear: Visible deterioration on the brush or handle beyond normal battery wear can compromise your brushing experience and effectiveness.